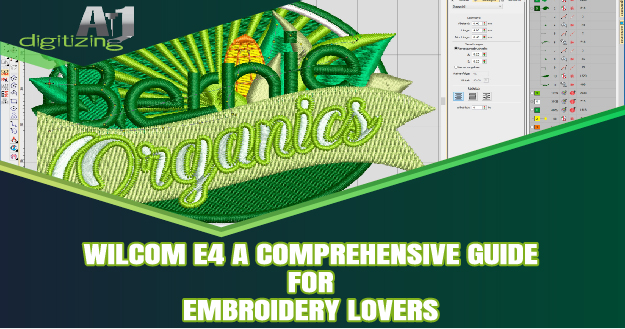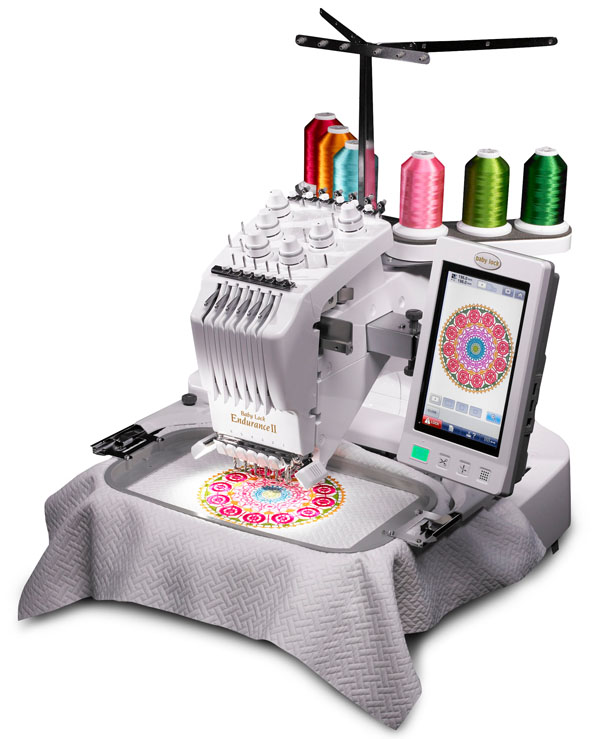
The Wilcom E4 embroidery machine is a powerful tool that offers a comprehensive range of features and functionality for professional digitizers, embroidery shops, industry trainers, and apparel decorators. With its multi-decoration software, it allows for the creation and manipulation of stitch files. Enabling users to transform graphics into stunning embroidery designs.
Whether you are a professional digitizer, run an embroidery shop, are an industry trainer, or an apparel decorator. The Wilcom E4 embroidery machine offers a comprehensive solution for all your embroidery needs. Its advanced features, user-friendly interface, and flexibility make it an ideal choice for creating stunning and professional embroidery designs.
Understanding the Features of Wilcom E4
When it comes to embroidery machines, the Wilcom E4 stands out with its impressive features and capabilities. From its wide selection of professional embroidery fonts to its support for various file formats. This machine offers a comprehensive solution for apparel decorators and industry trainers alike. With its advanced stitching parameters, users have full control over stitch types, colors, and sequencing, allowing for stunning and precise embroidery designs. The machine also boasts color management tools to ensure that the actual thread colors match the design accurately. Whether using traditional digitizing tools or graphics digitizing and editing tools. The Wilcom E4 provides the flexibility and customization options needed to bring any embroidery project to life.
Additionally, the machine allows for the integration of graphics into embroidery, enabling realistic photo embroidery and creative stitching effects. With customer approval and artwork features, as well as options for drawing and graphic objects. This machine caters to the needs of custom embroidery shops and retail embroidery shops alike. With its user-friendly interface and advanced features. The Wilcom E4 is the ultimate embroidery and multi-decoration software for all your embroidery needs.
Stitch Files
Stitch files are digital files that contain the instructions for embroidery machines to create intricate designs. These files are essential in the embroidery digitizing process as they guide the machine to create precise stitches.
There are several file formats commonly used in the embroidery industry. The DST format is widely supported by commercial embroidery machines, while the PES format is compatible with Brother machines.
EXP format, on the other hand, works well with Melco machines. It’s important to use the correct file format to ensure compatibility and successful embroidery.
To create and edit stitch files, there are various software programs available. Wilcom E4 is a comprehensive embroidery software that provides a range of features to digitize and edit designs. Inkscape with the Ink/Stitch extension is a popular choice for those looking for a free, open-source option. Additionally, Sierra Software’s Stitch Era Universal offers powerful tools for designing and editing stitch files.
Advanced Editing Tools in Wilcom E4
Wilcom E4 Embroidery Machine is equipped with advanced editing tools that make it easier to create and modify embroidery designs. One of these tools is the Color-Object List, which simplifies the sequencing of designs. With its intuitive drag and drop functionality, users can effortlessly arrange and re-order design objects. This feature allows for easy manipulation of design elements, ensuring a smooth and efficient workflow.
Another useful tool in Wilcom E4 is the Stitch List docker. This feature enables users to check individual stitches within a design. By zooming in and zooming out, users can closely examine the details of the stitches and make any necessary adjustments. This level of precision ensures that the embroidery design meets the desired quality standards.
Approval Sheet and Estimate Stitch Counts
The Approval Sheet feature in Wilcom E4 Embroidery Machine plays a crucial role in ensuring accuracy and customer satisfaction. Here’s how to use it:
1. Generating an Approval Sheet: After creating and digitizing the embroidery design, navigate to the “Approval Sheet” option in the software. Select the design and customize the layout of the sheet according to your preferences.
2. Reviewing and Approving Designs: Once the approval sheet is generated, it provides an overview of the design, including the stitch count, color sequence, and design preview. This allows the customer or designer to review the design before production. Any necessary changes can be easily made at this stage to ensure accuracy.
3. Calculating Stitch Counts: The approval sheet also provides an estimate of the stitch count for the design. This information is invaluable for estimating production time, thread usage, and costs. The stitch count is automatically calculated by the software based on the selected design elements and stitch types.
The importance of the approval sheet cannot be overstated. It allows for a thorough review of the design, minimizing errors and ensuring customer satisfaction. By providing an estimate of the stitch count, it helps in planning and budgeting for the embroidery project. Using the Approval Sheet feature in Wilcom E4 Embroidery Machine ensures accuracy, reduces rework, and results in stunning and flawless embroidery designs, all while satisfying customer requirements.
Variety of Fonts and Colors
The Wilcom E4 Embroidery Machine offers a wide variety of fonts and colors to choose from, giving you endless possibilities for your embroidery designs. When it comes to fonts, the machine provides a diverse selection that includes TrueType Fonts, Digitized Fonts, and an improved lettering feature with 25 new embroidery fonts.
TrueType Fonts allow you to import and use any font installed on your computer, giving you access to a vast library of pre-existing fonts.
Digitized Fonts, on the other hand, are specially created for embroidery and offer a unique and professional look.
In terms of colors, the Wilcom E4 Embroidery Machine offers a rich variety to help bring your designs to life. With an extensive color palette, you can easily find the perfect shade for your project. Whether you’re looking for vibrant and bold colors or subtle and intricate shades, the machine has you covered.
Multi-Decoration Software Options
The Wilcom E4 Embroidery Machine offers an array of multi-decoration software options that allow for advanced customization and editing of imported designs. These software options provide users with the ability to resize, split, and change thread colors, among other features.
One of the standout features of the multi-decoration software is its customization capabilities. Users can easily resize designs to fit different garment sizes or adjust them to create unique effects. The software also allows for the splitting of designs, which is useful when working with larger or more complex designs that need to be spread across multiple hoopings. This makes it easier to work with larger designs and achieve seamless results.
Another great feature is the ability to change thread colors. With the multi-decoration software, users can experiment with different thread color combinations. Giving them the flexibility to create stunning and personalized designs. This is particularly useful for custom embroidery shops and apparel decorators who want to offer a wide range of options to their customers.
The multi-decoration software options are designed to cater to users of all skill levels. Beginners will appreciate the user-friendly interface and intuitive tools that make it easy to get started. Advanced users, on the other hand, can take advantage of the advanced stitching parameters and creative stitching effects to push the boundaries of their designs.
Graphics Into Embroidery Capabilities
The Wilcom E4 Embroidery Machine boasts impressive graphics digitizing tools that allow users to easily convert bitmap artwork images into stunning embroidery designs. With this innovative software, users can import bitmap artwork images and seamlessly transform them into embroidery patterns.
The advanced stitching parameters and editing tools available in the software provide users with the flexibility to customize and enhance their graphics. These parameters allow for precise control over stitch types, colors, and sequence, resulting in highly detailed and professional designs.
What sets the Wilcom E4 apart is the option for optional bitmap image adjustments. Users can manipulate and fine-tune the imported images to achieve the desired level of detail and realism. This feature is particularly useful for creating realistic photo embroidery designs that capture intricate details and textures.
Whether you’re a beginner or an experienced embroidery professional. The Wilcom E4’s graphics into embroidery capabilities offer endless creative possibilities. From converting bitmap artwork images to utilizing advanced stitching parameters and optional adjustments. This machine empowers users to transform graphics into stunning embroidery artworks.
Professional Embroidery Fonts
Professional embroidery fonts play a crucial role in achieving high-quality and visually appealing embroidery designs with the Wilcom E4 Embroidery Machine. This machine offers a wide range of font options and functionalities that enable users to create precisely digitized embroidery designs from bitmap images.
With the Wilcom E4’s advanced software, users can convert bitmap images into digitized embroidery designs effortlessly. This feature eliminates the need for manual tracing and digitizing, saving time and effort while ensuring accurate and detailed results.
The software provides an extensive selection of professional embroidery fonts, including various styles and options to suit different design needs. From elegant script fonts to bold and modern styles, users can choose from a diverse library of fonts to enhance their embroidery projects.
Furthermore, the Wilcom E4 software allows for easy customization and adjustment of font parameters. Users can customize the size, letter spacing, density, and stitch length of the fonts, ensuring the perfect fit and appearance for each design.
High Resolution Embroidery Outputs
To achieve high resolution embroidery outputs using the Wilcom E4 embroidery machine, follow these steps:
Step1. Start by selecting a high resolution embroidery design file or import a high resolution image into the software. Ensure that the file or image has a high pixel count to maintain the clarity and detail in the final embroidery.
Step2. Adjust the stitching parameters in the software to optimize the resolution. This includes setting the stitch length, density, and underlay options. Experiment with different settings to find the ideal balance between detail and durability.
Step3. Take advantage of the advanced stitching options available in the Wilcom E4 software. These include features like corded stitching, opentype stitching, and creative stitching effects. Utilizing these options can enhance the resolution and add depth to your embroidery designs.
Step4. Before stitching, preview the design and make any necessary adjustments. Check for any misplaced stitches or spacing issues that may affect the resolution. Use the software’s editing tools to make corrections as needed.
Step5. Ensure that the Wilcom E4 embroidery machine is properly calibrated and configured for high resolution embroidery. Check the tension settings, needle types, and thread colors to ensure accurate reproduction of the design.
By following these steps and making the necessary adjustments and settings. You can achieve high resolution embroidery outputs using the Wilcom E4 embroidery machine. This will result in stunning and detailed embroidery designs that will impress your customers.
Setting Up Your Wilcom E4 Embroidery Machine
When it comes to setting up your Wilcom E4 embroidery machine for optimal performance, there are a few key steps to keep in mind.
First, it is crucial to select a high resolution embroidery design file or import a high resolution image into the software. This ensures that the final embroidery maintains clarity and detail. Additionally, adjusting the stitching parameters, such as stitch length, density, and underlay options, will help optimize the resolution. Experimenting with different settings will help find the ideal balance between detail and durability. The Wilcom E4 software also offers advanced stitching options, such as corded stitching, open type stitching, and creative stitching effects. Which can further enhance resolution and add depth to your designs.
Before stitching, it is essential to preview the design and make any necessary adjustments using the software’s editing tools. Finally, ensure that your Wilcom E4 embroidery machine is properly calibrated and configured for high resolution embroidery by checking tension settings, needle types, and thread colors to ensure accurate reproduction. By following these steps, you can set up your Wilcom E4 embroidery machine for stunning and precise embroidery results.
Placement of the Machine in Your Workspace
The proper placement of the Wilcom E4 embroidery machine in your workspace is crucial for optimal performance and convenience. When choosing a location for this powerful machine, there are a few factors to consider.
Firstly, ensure that you have enough space to accommodate the machine and all its accessories. The Wilcom E4 embroidery machine is compact in size, but it still requires some room to operate efficiently. Make sure you have enough space to maneuver around the machine without any obstructions.
Ventilation is also an important consideration. Embroidery machines generate heat during operation, so it’s essential to place the Wilcom E4 in a well-ventilated area. This will prevent overheating and ensure the machine runs smoothly without any issues.
Accessibility to power outlets is another factor to keep in mind. Make sure the machine is positioned close to a power source, preferably with easy access to multiple outlets. This will prevent any inconvenience during operation and reduce the risk of tripping over cords.
Lastly, it’s recommended to place the Wilcom E4 embroidery machine in a well-lit area. Sufficient lighting is essential for accurately viewing and managing the embroidery process, ensuring you can easily monitor the stitching and make any necessary adjustments.
Connecting to Your Computer or Networked Device
To connect your Wilcom E4 Embroidery Machine to your computer or networked device, follow these steps:
First, make sure that your computer meets the system requirements for the machine. Check the specifications provided by Wilcom to ensure compatibility.
Next, connect the embroidery machine to your computer. You can use the provided USB cable to establish a direct connection. Alternatively, if your machine supports network connectivity, you can connect it to your local network using an Ethernet cable.
Once the physical connection is established, you may need to install drivers or software to establish a connection between the machine and your computer. Wilcom provides the necessary software and drivers on their website. Simply follow the instructions provided with the machine to download and install the required files.
After installation, launch the software and follow the prompts to connect the machine to your computer. The software will guide you through the process and allow you to configure settings such as machine recognition and communication options.
Ensure that both your computer and embroidery machine are powered on and establish a successful connection. Once connected, you can transfer embroidery designs, adjust settings, and control the machine from your computer or networked device.
Loading Thread, Hoops, and Fabric into the Machine
Loading thread, hoops, and fabric into the Wilcom E4 Embroidery Machine is a straightforward process that ensures smooth operation and accurate embroidery results.
To start, make sure you have a high-quality embroidery thread that is compatible with your machine. Begin by placing the thread on the thread stand, then thread it through the thread guide and tension disks following the indicated path. Finally, insert the thread into the needle eye and pull it through to the back, leaving a tail for easy starting.
Attaching hoops is the next step. The Wilcom E4 Embroidery Machine comes with different hoop sizes, so choose the appropriate one for your design. Loosen the hoop screw and place the inner hoop on a flat surface. Lay your fabric on top and slide the outer hoop over it, aligning the notches. Tighten the screw to secure the fabric tightly.
Loading the fabric onto the machine is the final step. Open the hoop attachment area and place the hoop in the designated position. Make sure the fabric is centered and that the design fits within the hoop area. Close the hoop attachment area, ensuring that the fabric is held securely.
Before starting the embroidery process, check the fabric tension. Adjust the tension if necessary to avoid loose or puckered stitches. Now, you are ready to start the machine and watch as your design comes to life.
Conclusion
In conclusion, the Wilcom E4 embroidery machine is an invaluable tool for professional digitizers, embroidery shops, industry trainers, and apparel decorators. Its comprehensive range of features and multi-decoration software empowers users to create and manipulate stitch files, transforming graphics into stunning embroidery designs. Whether you’re a seasoned digitizer, run an embroidery shop, or are involved in the industry. The Wilcom E4 offers a solution to meet your embroidery needs. Its advanced editing tools, approval sheet, variety of fonts and colors, multi-decoration software options, graphics into embroidery capabilities, professional embroidery fonts, and high-resolution outputs ensure precise and stunning embroidery designs.
Proper setup and connection, along with thread, hoop, and fabric loading, guarantee seamless operation. For professional embroidery services , the Wilcom E4 embroidery machine is the ultimate choice. Get started with your embroidery projects today!
FAQs (Frequently Asked Questions)
Q1. What is the primary target audience for the Wilcom E4?
The Wilcom E4 embroidery machine is designed for professional digitizers, embroidery shops, industry trainers, and apparel decorators.
Q2. What are some key features of the Wilcom E4 machine?
The Wilcom E4 offers advanced stitching parameters, color management tools, graphics integration, and various fonts and colors for embroidery design.
Q3. Why is it important to use the correct file format?
Using the correct file format ensures compatibility with embroidery machines and successful embroidery.
Q4. What is the role of the Approval Sheet feature in Wilcom E4?
The Approval Sheet feature allows for design review and customer approval, as well as providing an estimate of the stitch count for accurate planning and budgeting.
Q5. How does the Wilcom E4 embroidery machine offer flexibility?
The machine provides a wide variety of fonts, including TrueType Fonts and Digitized Fonts, and offers an extensive color palette to choose from, allowing for endless design possibilities.


