If you’re a creative enthusiast or a seasoned embroidery fan, you’ve likely encountered the mesmerizing satin stitch technique. This versatile and elegant embroidery method can transform any fabric into a work of art. In this comprehensive guide, we’ll delve deep into the world of satin stitch, exploring its various forms, techniques, and applications.
You’re a beginner looking to embark on your stitching journey or an experienced embroiderer seeking to refine your skills. This article is your ultimate resource for mastering the art of satin stitching.
Table of Contents
1. Introduction
2. The Basics of Satin Stitch
3. Adding Dimension to Your Designs
4. Sewing Satin : Right Fabric and Thread
5. Satin Stitch on a Sewing Machine
6. Embroidery on Satin : Tips and Tricks
7. Mastering the Satin : Step-by-Step Guide
7.1. Preparing Your Fabric and Hoop
7.2. Creating the Outline
7.3. Filling the Design with Satin Stitch
7.4. Blending Colors and Shades
7.5. Adding Depth with Padded Satin Stitch
8. Satin Stitch Beyond the Basics
8.1. Satin Stitch Leaves: A Natural Touch
8.2. Intricate Floral Embroidery with Satin Stitch
8.3. Combining Satin Stitch with Other Techniques
9. Satin Stitch for Beginners
9.1. Maintaining Consistency
9.2. Managing Thread Tension
9.3. Dealing with Knots and Tangles
10. Long and Short Satin Stitch
11. Common Issues and How to Fix Them
12. Framing and Displaying Your Satin Stitch Creations
13. Incorporating Satin Stitch into Fashion and Home Decor
14. Satin Stitch Community: Sharing, Learning, and Inspiring
15. Conclusion: Your Journey to Satin Stitch Mastery
An embroidery is an art form that allows you to express your creativity and imagination through thread and fabric. Satin stitch, in particular, is a standout technique that delivers smooth, glossy, and elegant results. But before we dive into the intricate details, let’s start with the fundamentals.
1. Introduction
Satin stitch, a captivating form of surface embroidery digitizing, breathes life into designs through the meticulous arrangement of long, parallel stitches. These stitches, meticulously aligned side by side, bestow a seamless and polished allure akin to luxurious fabric. This technique finds its artistic expression in crafting daring, vivid shapes, graceful letters, and elaborate intricacies, gracing many embroidery projects with charm and finesse.
Whether adorning garments, enhancing home decor, or adding an artistic touch to personal creations, this stitch is a timeless and versatile embroidery method, inviting beginners and seasoned artisans to delve into its captivating realm.
2. The Basics of Satin Stitch
Initiating your exploration of the demands a collection of vital tools and resources. These essentials encompass:
– An embroidery hoop and loop that serves as your artistic canvas.
– Ideally, a smooth and tightly woven fabric selection provides an optimal foundation.
– The delicate thread or floss that breathes life into your creative vision.
– The trusty embroidery needle is a conduit for your artistic expression.
– Scissors are the faithful companion for trimming and refining your work.
– A water-soluble marker or pencil enables the delicate tracing of your envisioned design.
Once equipped with these materials, you’re poised to choose your artistic motif and meticulously prepare your fabric within the embrace of the hoop. Ensuring the fabric’s tautness within the hoop is paramount, paving the path for a seamless and gratifying stitching journey.
3. Adding Dimension to Your Designs
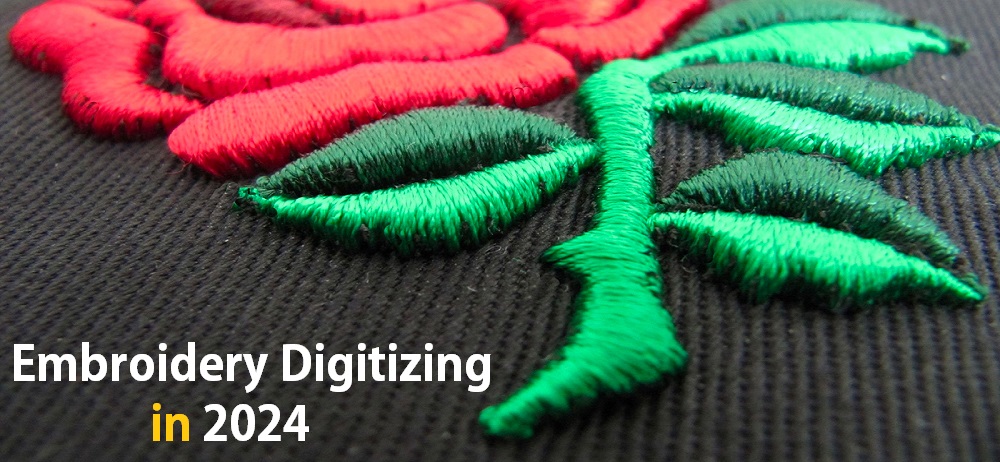
Elevating the artistry of padded satin stitch, introduces an exquisite layer of dimension beneath its satin threads. This innovative approach yields a captivating raised effect, breathing life into your custom embroidery with captivating texture and visual allure. The method unfolds as follows:
Begin by delicately tracing your envisioned design onto the fabric, setting the stage for your creative journey. Progress to meticulously filling the contours of the design’s shape with an array of tiny, intimately spaced straight stitches, setting the foundation for the forthcoming textured magic.
The pièce de résistance involves adorning this intricate foundation with the embrace of satin stitches, thoughtfully layered over the padding. These stitches gracefully trace the contours of the design, culminating in a masterful interplay of depth and form.
The realm of padded satin stitch unveils its true prowess when crafting 3D embroidery effects that embellish flowers, fruits, and intricate motifs, capturing the essence of nature’s beauty and translating it onto your fabric canvas.
4. Sewing Satin : Right Fabric and Thread
The harmonious partnership between fabric and thread is vital to your masterpiece’s success in embroidery. A reasonable selection unfolds as follows:
Delve into the realm of fabrics, seeking those endowed with smoothness and tightly woven craftsmanship. Fabrics such as silk, or cotton are splendid choices, laying the groundwork for a flawless stitching journey. Their receptive surfaces eagerly embrace the intricate dance of satin stitch, yielding a canvas primed for elegance.
As your needle weaves its magic, the choice of thread imparts a transformative touch. Embroidery floss or the luxurious sheen of silk thread emerge as prime contenders, promising a radiant finish. Their luminosity interacts with light, adding a lustrous vibrancy that elevates your creation to artistic heights.
In the symphony of fabric and thread, your embroidery ventures forth, the embodiment of finesse and meticulous craftsmanship.
5. Satin Stitch on a Sewing Machine
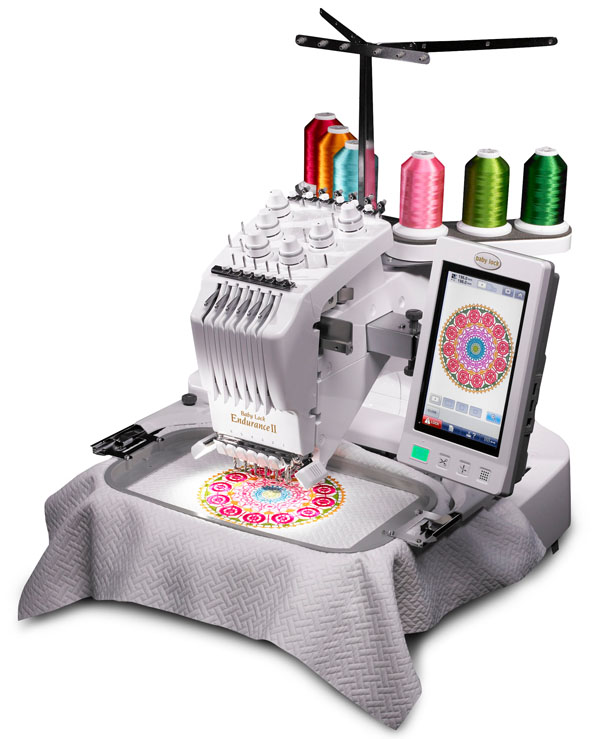
If you aim for efficiency and precision, stitching on a sewing machine is worth exploring. Set your sewing machine to a satin stitch setting and adjust the stitch length and width to achieve your desired results. This method is beneficial for larger machine embroidery designs or when time is of the essence.
6. Embroidery on Satin : Tips and Tricks
Embroidering requires a delicate touch to avoid puckering or distortion. Use a stabilizer to support the fabric and prevent slipping. Start with smaller designs to practice before moving on to more intricate projects. Remember to match your needle size to the fabric to prevent snags or visible holes.
7. Mastering the Satin : Step-by-Step Guide
7.1 Preparing Your Fabric and Hoop
Before you begin stitching, make sure your fabric is clean and ironed. Stretch it taut in the embroidery hoop, ensuring it’s smooth and free of wrinkles.
7.2 Creating the Outline
Using a water-soluble marker or pencil, trace the outline of your design onto the fabric. This serves as your guide for placing the stitches.
7.3 Filling the Design with Satin Stitch
Thread your needle with your chosen embroidery floss or thread color. Start from the back of the fabric and bring the needle up through the marked outline. Take tiny stitches closely following the design, ensuring each stitch lies flat and snug against the previous one.
7.4 Blending Colors and Shades
For a gradient effect or to blend colors, you can gradually transition from one thread color to another. This adds depth and dimension to your design.
7.5 Adding Depth with Padded Satin Stitch
Layer straight stitches within the design’s shape to create a padded effect. Then, layer satin stitches over the padding, keeping the stitches close together for a seamless look.
8. Satin Stitch Beyond the Basics
This is a versatile technique that opens the door to creative possibilities. Let’s explore a few unique applications:
8.1 Satin Stitch Leaves: A Natural Touch
Bring a touch of nature to your embroidery by creating intricate leaves. The smooth, glossy appearance of satin stitch mimics the sheen of real leaves, making them a stunning addition to fall and autumn designs.
8.2 Intricate Floral Embroidery
Use this technique to capture the delicate beauty of flowers. Layer different thread shades to create depth and mimic the natural gradation of petals.
8.3 Combining with Other Techniques
Combine with other embroidery techniques like French knots, chain stitches, or beadwork. The interplay of textures adds visual interest to your creations.
9. Satin Stitch for Beginners
You might encounter a few hurdles when working as a beginner. Here are some common challenges and how to overcome them:
9.1 Maintaining Consistency
Consistency in stitch length and tension is crucial for a smooth appearance. Practice your stitches on scrap fabric before working on your main project.
9.2 Managing Thread Tension
Achieving the proper tension prevents loose or puckered stitches. Adjust the tension settings on your sewing machine or manually maintain even tension when hand stitching.
9.3 Dealing with Knots and Tangles
Knots and tangles can be frustrating. Use shorter lengths of thread to reduce tangling, and secure the thread with tiny stitches at the back of the fabric.
10. Long and Short Satin Stitch
Long and short, satin stitch, affectionately dubbed the ombre or gradient stitch, unveils a mesmerizing variation that grants your creations a captivating shading allure. This technique thrives on the interplay of stitch lengths, conjuring a seamless metamorphosis from ethereal light to rich darkness.
The gradation unfolds as your needle dances across the fabric, infusing your design with an enchanting depth and dimension. This exquisite stitch variation is a testament to your artistic finesse, imprinting your embroidery with the nuanced beauty of a gradient masterpiece.
11. Common Issues and How to Fix Them
Embroidery doesn’t always go as planned. Here are solutions to some common problems:
– Fabric Puckering: Use a stabilizer, and avoid pulling the thread too tight.
– Uneven Stitches: Practice maintaining consistent tension and stitch length.
– Thread Breakage and Solutions: Check for burrs on the needle or use a higher-quality thread.
12. Framing and Displaying Your Creations
Upon finalizing your artistic opus, the spotlight shifts to its grand unveiling. Deliberate the art of presentation by delicately framing your embroidery within a traditional hoop or an ornate decorative frame. This pivotal touch elevates the inherent beauty of your creation, amplifying its visual allure and safeguarding it from the perils of dust and potential harm. Through thoughtful framing, your masterpiece finds its rightful place as a captivating focal point, inviting admirers to immerse themselves in the intricate world of your embroidered artistry.
13. Incorporating Satin Stitch into Fashion and Home Decor
Transcends the boundaries of conventional embroidery, inviting exploration within the realms of fashion and home embellishments. Unveil its potential by gracing garments, cushions, and table linens with delicate embroidery accents. The silky, luminous touch it imparts bestows an aura of sophistication upon each piece.
As it intertwines with fabric, this breathes life into attire and interior accents, transforming them into timeless works of art. Elevate your surroundings with the splendid charm of this embroidery technique, infusing an air of refinement that captivates the senses and evokes admiration.
14. Satin Stitch Community: Sharing, Learning, and Inspiring
Embarking on an embroidery journey unveils a world of enrichment within a vibrant community. Joining this creative collective offers a treasure trove of wisdom and inspiration. Be part of a dynamic exchange by showcasing your creations, imbibing insights from fellow embroiderers, and engaging in enlightening conversations that invigorate your craft.
The community becomes a nurturing space where ideas flow freely, skills are honed collectively, and the passion for artistic expression thrives. With each stitch and shared experience, you contribute to an ever-evolving tapestry of creativity that celebrates the beauty and boundless potential of the art form.
15. Conclusion: Your Journey to Mastery
Embarking on the journey to mastering is a rewarding endeavor. With dedication, practice, and insights from this guide, you can create stunning pieces that showcase your artistic flair. Whether embellishing garments, creating home decor, or simply indulging in the joy of beautiful embroidery, this will remain a valuable skill in your creative repertoire.
FAQs (Frequently Asked Questions)
Q1: Can I use any fabric for satin stitch embroidery?
While satin stitch can be used on various fabrics, it works best on smooth and tightly woven materials like silk, or cotton.
Q2: How do I prevent my fabric from puckering while working on a satin stitch?
To prevent fabric puckering, use a stabilizer and avoid pulling the thread too tight. Keeping your fabric taut in the embroidery hoop also helps.
Q3: Can I use a regular sewing machine for satin stitch embroidery?
You can use a regular sewing machine with a satin stitch setting for larger projects. Adjust stitch length and width for desired results.
Q4: Is satin stitch suitable for beginners?
Absolutely! While it may take practice to achieve consistent results, satin stitch is accessible to beginners and offers a beautiful opportunity to refine your stitching skills.
Q5: What is the difference between a satin stitch and a long and short one?
Satin stitch involves parallel stitches, while long and short satin stitch varies stitch length to create shading and gradient effects.


