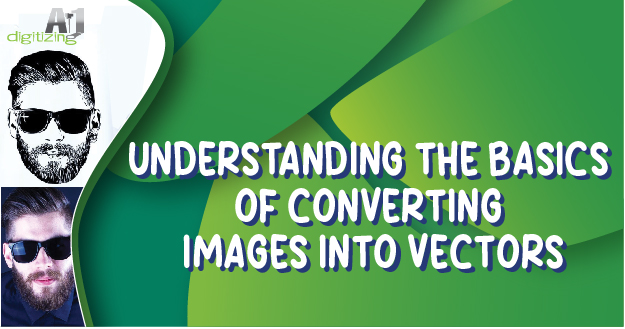
Image into vectors conversion refers to transforming raster images, composed of pixels, into vector graphics made of mathematical equations. This conversion is vital as it offers numerous advantages, such as scalability, resolution independence, and the ability to edit and modify images easily. Understanding image vectorization is crucial for graphic designers, illustrators, and professionals in various industries who work with digital and print media.
This blog aims to provide a comprehensive understanding of image vector conversion. It covers various topics, including the difference between raster and vector images, standard raster formats, the definition and features of vector graphics, conversion methods (both manual and automated), and the tools used for the conversion process.
It also explores techniques like image tracing, configuring settings, handling complexity, and retouching vectorized images. Additionally, the blog delves into the benefits and applications of vector graphics, offers tips for successful conversion, and concludes by emphasizing the importance of understanding vector conversion and encouraging readers to explore the world of vector graphics.
1. Image Formats
Raster vs. Vector Images
Regarding image formats, two primary types exist: raster and vector images. Raster images are arranged in a grid; each pixel carries specific color and intensity information. On the other hand, vector images are created using mathematical equations that define lines, curves, and shapes—the critical distinction between the two lies in their scalability.
Raster images have a fixed resolution and can lose quality when scaled up, while vector images can be scaled infinitely without any loss of quality. Understanding this fundamental difference is essential for grasping vector graphics’ benefits.
Common Raster Formats
This section delves into the commonly used raster image formats, including JPEG, PNG, and GIF. Each design has its features, use cases, and limitations. JPEG (Joint Photographic Experts Group) is widely used for compressing photographs while maintaining a reasonable level of quality. PNG (Portable Network Graphics) is commonly used for images with transparent backgrounds and supports lossless compression. GIF (Graphics Interchange Format) is famous for animated pictures and simple graphics.
Exploring these formats helps me better understand their specific characteristics and how they can be utilized in different contexts. Additionally, the limitations of raster formats, especially in terms of scalability and editing capabilities, become apparent.
Advantages of Vectors
Vector graphics offer several advantages over raster images, making them highly valuable in various applications. One significant advantage is scalability without any loss of quality. Since vector graphics are based on mathematical equations, they can be scaled up or down infinitely, ensuring crisp and sharp visuals at any size.
Resolution independence is another advantage, as vector images are not tied to a specific resolution and can be outputted at various solutions without compromising quality. Additionally, vector graphics provide unparalleled flexibility in editing and modifying graphics. Elements such as colors, shapes, and sizes can be easily adjusted, and the non-destructive nature of vectors allows for precise modifications.
Understanding these advantages highlights the value of working with vector graphics and why many designers and professionals prefer them over raster images in specific contexts.
2. Understanding Vector Graphics
Definition and Features
Vector graphics are images created using mathematical equations to define lines, curves, and shapes. Unlike raster images, which are made up of pixels, vector graphics are resolution-independent and can be scaled up or down without losing quality. This section clearly defines vector graphics, emphasizing their inherent scalability.
Using mathematical formulas, vector graphics ensure precise and sharp visuals, making them ideal for creating high-quality graphics. Additionally, the versatility of vector graphics allows for easy modification and manipulation of elements such as colors, shapes, and sizes, providing designers greater flexibility in their creative process.
Vector File Formats
This section explores standard vector file formats, including SVG (Scalable Vector Graphics), AI (Adobe Illustrator), and EPS (Encapsulated PostScript). It delves into their compatibility, usage scenarios, and specific features, providing readers with insights to select the appropriate format for their needs. SVG, a widely supported format for web graphics, offers scalability and interactivity.
AI, the native format of Adobe Illustrator, is favored for professional graphic design projects. EPS, commonly used in print and publishing, provides compatibility with various software applications. Understanding the characteristics and distinctions of these vector file formats empowers designers to choose the most suitable design for their intended purposes, ensuring efficient workflow and compatibility with different software and platforms.
3. Converting Raster Images
Reasons to Convert
Converting raster images into vectors offers several compelling reasons. One key motivation is scalability. Raster images have a fixed resolution, and when scaled up, they can become pixelated and lose quality. By converting them into vector graphics, the images can be scaled infinitely without degradation, ensuring sharp and clear visuals at any size.
Vector graphics provide greater flexibility and ease of editing. Elements such as colors, shapes, and sizes can be modified precisely, allowing seamless customization. Moreover, converting raster images to vectors is essential for applications like printing and embroidery, where scalability, flexibility, and precision are crucial.
Conversion Process Overview
Readers are guided through a step-by-step breakdown of the image-to-vector conversion process. This overview covers the essential stages involved in converting raster images into vectors. It starts with importing the image into vector editing software, followed by techniques such as image tracing and configuring settings to generate the initial vector representation.
The process may also involve handling complexity in the image, such as intricate artwork or textures. Finally, retouching and refining the vectorized image may be necessary to achieve optimal results. By providing an overview of the conversion workflow, readers gain a holistic understanding of the steps involved.
Manual vs. Automated Methods
This section compares manual and automated conversion methods, discussing their advantages and disadvantages. Manual conversion involves hand-tracing the raster image using vector editing tools, offering greater control and precision. However, it can be time-consuming and may require advanced skills.
Automated conversion methods, on the other hand, employ algorithms and image tracing techniques to convert raster images into vectors automatically. While they offer convenience and speed, the results may be less precise and require further refinement. By understanding the pros and cons of each approach, readers can choose the most suitable method based on the complexity of their images and their specific requirements.
Conversion Tools
Popular software tools for image vectorization are introduced, including Adobe Illustrator, Inkscape, and CorelDraw. Each device has its features, capabilities, and user interfaces. Adobe Illustrator, for example, is a professional-grade software widely used in the industry, offering advanced vector editing functionalities.
Inkscape, an open-source option, provides a free alternative with a user-friendly interface. CorelDraw offers a comprehensive suite of design tools suitable for vector conversion and graphic design. By familiarizing themselves with these tools and their key features, readers can make informed choices when selecting software for their vector conversion needs.
4. Conversion Process
Image Tracing Techniques
This section delves into various image tracing techniques, including bitmap and centerline tracing. It explains the workings of each method and provides insights into when to use them for optimal results. Bitmap tracing converts pixel-based images into vector graphics by identifying edges and converting them into paths.
Centerline tracing, on the other hand, focuses on converting line-based photos into vector graphics, which is particularly useful for creating smooth and consistent outlines. By understanding these techniques, readers can select the most appropriate method based on the characteristics of their source images.
Configuring Settings
The blog explores the key settings and parameters of the vector conversion process. It covers adjusting thresholds, curves, and levels to achieve the desired outcomes. Fine-tuning these settings plays a crucial role in obtaining clean and accurate vectors.
Points determine the sensitivity of the tracing process, curves help define the shape and smoothness of the vector paths, and levels control the level of detail in the final result. Understanding and adequately configuring these settings contribute to achieving high-quality vector conversions.
Handling Complexity
Converting complex images can pose challenges during the conversion process. This section offers strategies and tips for effectively dealing with intricate artwork, photographs, and textures. Techniques such as simplifying complex shapes, breaking down complex elements into vectors simpler components, and adjusting tracing settings for optimal results are discussed. By implementing these strategies, readers can ensure the best possible vectorization outcomes, even for complex source images.
Retouching and Refining
Once the conversion process is complete, vector images may require post-processing and refinement. This section covers techniques for enhancing the vectorized image. Smoothing paths, adjusting curves to achieve desired shapes, and removing imperfections are discussed.
Preserving color and detail is emphasized to ensure the vectorized image retains the essence of the original raster image. By applying these retouching and refining techniques, readers can enhance the quality and aesthetics of their vectorized images, resulting in visually appealing graphics with precision and accuracy.
5. Benefits and Applications
Scalability and Resolution Independence
This section explores the advantages of vector graphics, emphasizing their ability to scale without losing quality and their resolution independence. Readers understand the importance of vector graphics in various display mediums and sizes. Whether for web design, print media, or large-scale signage, vector graphics ensure crisp and sharp visuals, regardless of the extent they are displayed.
Editing and Modifying Vectors
Highlighting the flexibility and ease of editing vector graphics, this section explains how readers can effortlessly modify colors, shapes, and sizes. The non-destructive nature of vectors allows for precise adjustments. Making it simple to customize graphics according to specific design requirements. By working with vector graphics, designers can iterate and experiment with different elements, ensuring they achieve the desired aesthetic and design objectives.
Usage in Different Industries
This section explores the versatility of vector graphics across various industries. Readers gain insights into vector graphics applied in graphic design, where they play a significant role in creating marketing collateral, brochures, and digital assets. Vector graphics also find printing applications, allowing for high-quality output across different mediums. Furthermore, industries such as embroidery and signage benefit from vector graphics’ scalability and ability to retain clarity and detail even when resized or reproduced.
Logos, Icons, and Illustrations
Focusing on specific applications, this section highlights the crucial role vector graphics play in creating logos, icons, and illustrations. Readers understand how vector graphics enable scalability, versatility, and impactful visuals in branding and design. Logos can be resized for various purposes without compromising quality, while icons can be adapted to different display sizes and formats. Additionally, vector graphics allow artists and illustrators to easily create intricate and detailed illustrations, ensuring vibrant and captivating visuals in their artistic creations.
6. Tips for Successful Conversion
Choose the Appropriate Method
Readers are guided in selecting the most suitable conversion method based on the complexity of their images. By assessing the intricacy of the image, readers can make informed decisions that lead to better results and increased workflow efficiency. Choosing the correct method ensures that the conversion process aligns with the image’s specific requirements, optimizing the vectorized output’s quality.
Use High-Quality Source Images
Emphasizing the significance of starting with high-resolution and clean source images. This tip encourages readers to utilize pictures of the highest possible quality. High-quality source images provide a solid foundation for the conversion process, leading to improved results. By using images with sufficient resolution and clarity, readers can ensure that the vector conversion accurately represents the details and nuances of the original image.
Experiment and Refine Settings
This tip encourages readers to engage in iterative adjustment of settings to achieve optimal outcomes. Readers can fine-tune the conversion process by experimenting with different parameters and refining settings and obtain cleaner and more precise vector conversions. This tip promotes an exploratory approach, allowing readers to discover the best locations for their images and desired results.
Practice for Improvement
Highlighting the importance of practice and experience in vector conversion, this tip encourages readers to refine their skills continuously. By actively engaging in the conversion process and practicing vectorization techniques, readers can enhance the quality and efficiency of their work over time. Through practice, readers can better understand the nuances of converting images into vectors. Leading to improved results and increased proficiency in the conversion process.
The Takeaway
Understanding image vector conversion is essential for designers and professionals in the creative industry. We encourage you to explore the vast potential of vector graphics and further develop your vectorization skills.
You can transform your designs into vector graphics, Contact A1 Digitizing, a leading embroidery digitizing service. Unlock the power of vector graphics with A1 Digitizing and elevate your creative endeavors to new heights.
Frequently Asked Questions (FAQs)
1. What is image vector conversion, and why is it important in modern design practices?
Image vector conversion refers to transforming raster images into vector graphics, which offer scalability, resolution independence, and easy editing. Understanding this conversion process is crucial for designers and digital and print media professionals.
2. What are the advantages of vector graphics over raster images?
Vector graphics provide scalability without losing quality, resolution independence, and flexibility in editing and modifying graphics. These advantages make vector graphics highly valuable in various design applications.
3. What are the key considerations when choosing a conversion method for image vectorization?
It is essential to assess the complexity of the image and select the appropriate conversion method accordingly. Manual and automated processes have advantages and disadvantages. Which should be considered based on the project’s specific requirements.
4. How can high-quality source images improve the vector conversion process?
Starting with high-resolution and clean source images ensures better results during the vector conversion process. High-quality images capture more details and allow for more accurate representation in the vectorized output.
5. What are some tips for successful image vector conversion?
Choosing the appropriate conversion method, using high-quality source images, experimenting with settings. Continuously practicing and refining skills are essential for achieving successful vector conversions.


