In the digital age, creativity knows no bounds. From stunning digital art to intricate embroidery designs, there are endless possibilities to explore. One fascinating avenue is converting image to PXF file. PXF (PE-Design Stitch Format) is a file format commonly used in embroidery software. It contains instructions for stitching patterns, making it an essential format for machine embroidery enthusiasts and professionals alike. In this comprehensive guide, we will delve into the process of converting an image into a PXF file, unlocking a world of creative potential.
Understanding Image to PXF File
Before we dive into the conversion process, let’s grasp the fundamentals of PXF files. A PXF file is essentially a set of instructions that dictate how an embroidery machine should stitch a design. It contains information such as stitch types, colors, stitch order, and other relevant parameters. This format enables precise reproduction of intricate designs on fabric with embroidery machines.
Tools Required for Image to PXF File:
To embark on the journey of converting image to PXF file, you’ll need the following tools:
1. Embroidery Software:
Choose a reputable embroidery software that supports PXF file format. Popular choices include PE-Design, Embird, and Wilcom.
2. Image Editing Software:
Any software capable of editing and manipulating images will suffice. Adobe Photoshop, GIMP, or even online tools like Canva can be used.
3. High-Quality Image:
Start with a clear and high-resolution image to ensure the best results.
4. Embroidery Machine:
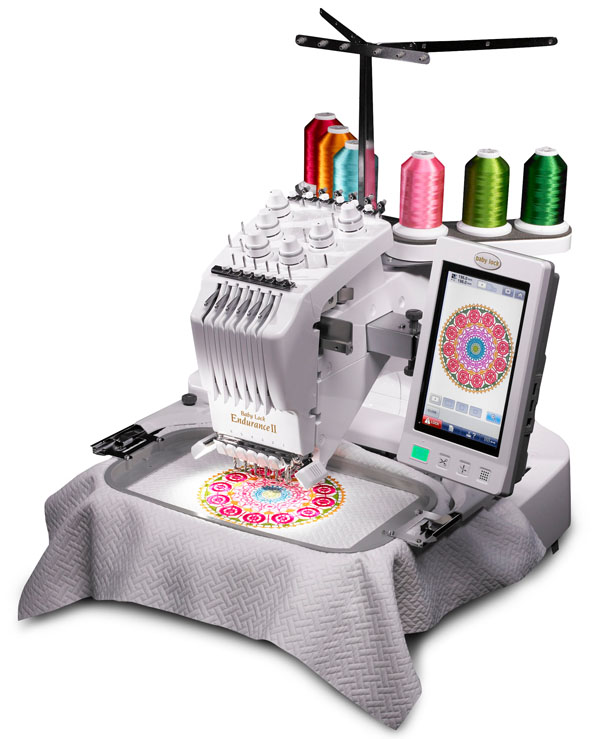
Finally, you’ll need an embroidery machine to stitch out the design once it’s converted into a PXF file.
Image to PXF File A Step-by-Step Guide
1. Choose the Image
Begin by selecting your design you wish to convert image to PXF file. Opt for images with distinct shapes and clear outlines, as they translate better into embroidery designs.
2. Image Preparation
Open the selected image in your preferred image editing software. Adjust the brightness, contrast, and saturation if necessary to enhance clarity. Additionally, consider converting the image to grayscale to simplify the design.
3. Resize and Crop
Resize the image to match the desired dimensions for your embroidery project. It’s advisable to crop any unnecessary elements to focus solely on the main subject of the design.
4. Simplify the Design
Complex images with intricate details may not translate well into embroidery. Simplify the design by reducing the number of colors and eliminating fine details that may be challenging to replicate with stitches.
5. Import into Embroidery Software
Once the image is optimized, import it into your chosen embroidery software. Most embroidery software programs allow you to import images in various formats, including JPEG, PNG, and BMP.
6. Digitize the Design
This is where the magic happens. Utilize the digitizing tools provided by the embroidery software to convert the image into stitches. Trace the outlines of the design, assign stitch types, and define the color palette. Pay close attention to details such as stitch density and underlay to ensure optimal stitch quality.
7. Preview and Adjust
After digitizing the design, preview it within the embroidery software to assess the final result. Make any necessary adjustments to stitch settings, color placement, or stitch direction to refine the design further.
8. Save as PXF File
Once you’re satisfied with the design, save it as a PXF file. Ensure that you choose the appropriate settings, such as stitch format version and machine compatibility, before saving.
9. Transfer to Embroidery Machine
Finally, transfer the saved PXF file to your embroidery machine using a USB drive or compatible transfer method. Load the design onto the machine and follow the machine’s instructions to stitch out the design on your chosen fabric.
Tips for Success in Image to PXF File Conversion:
– Start with simple designs and gradually progress to more complex ones as you gain experience.
– Experiment with different stitch types and settings to achieve varying textures and effects in your embroidery designs.
– Regularly clean and maintain your embroidery machine to ensure optimal performance and stitch quality.
– Keep backups of your PXF files and original images to avoid losing your work due to unforeseen circumstances.
– Join online forums and communities dedicated to machine embroidery to learn from fellow enthusiasts and exchange tips and tricks.
Conclusion:
Converting an image to PXF file opens up a world of creative possibilities for embroidery enthusiasts. With the right tools, techniques, and a dash of creativity, you can transform any image into a stunning embroidery design ready to be stitched onto fabric. Whether you’re a hobbyist looking to personalize your projects or a professional seeking to expand your repertoire, mastering the art of converting image to PXF file will undoubtedly elevate your embroidery endeavors to new heights. So, roll up your sleeves, unleash your imagination, and let the stitches tell your story!
If you’re looking to explore these crafts further or seek professional assistance, we offer embroidery services to help bring your vision to life contact us today.
FAQs (Frequently Asked Questions)
Q1: What is a PXF file, and how is it used in embroidery?
A PXF file is a file format used in embroidery software to store digitized stitching instructions. It contains information such as stitch types, colors, and stitch order, enabling embroidery machines to reproduce designs accurately on fabric.
Q2: What tools are required to convert an image into a PXF file?
To convert an image into a PXF file, you’ll need embroidery software that supports the PXF format, image editing software, a high-quality image, an embroidery machine, and a computer to run the software.
Q3: What is the importance of simplifying the design during the conversion process?
Simplifying the design is crucial to ensure that it translates effectively into stitches. Complex images may result in overly intricate designs that are challenging to embroider. By reducing the number of colors and eliminating fine details, the design becomes more manageable for embroidery.
Q4: How can one ensure optimal stitch quality in the final embroidered design?
To achieve optimal stitch quality, attention to detail is paramount. It’s essential to adjust settings such as stitch density, underlay, and stitch types according to the characteristics of the design. Regular maintenance of the embroidery machine also contributes to consistent stitch quality.
Q5: What are some tips for success when converting images into PXF files?
Start with simple designs, experiment with different stitch types and settings, maintain your embroidery machine regularly, keep backups of your files, and seek guidance from online communities and forums dedicated to machine embroidery to enhance your skills and knowledge.


