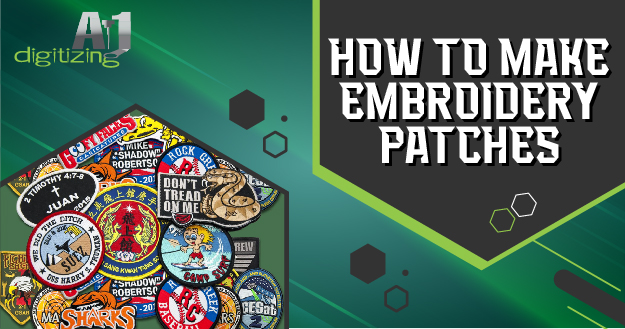
Embroidery patches are small, custom fabric pieces designed using embroidery machines. These embroidery patches are made from sturdy fabric and can be easily sewn or adhered onto clothing, bags, or accessories. They are a popular way to add personalization and style to any item.
Table Of Contents
1. Benefits of Making Your Embroidery Patches
2. Materials Needed for Making Embroidery Patches
3. Commercial Embroidery Machine (Optional)
4. Designing Your Patch
5. Choosing a Shape for Your Patch
6. Choosing the Right Size for Your Patch
7. Transferring your Design onto the Fabric
8. The Takeaway
9. FAQs (Frequently Asked Questions)
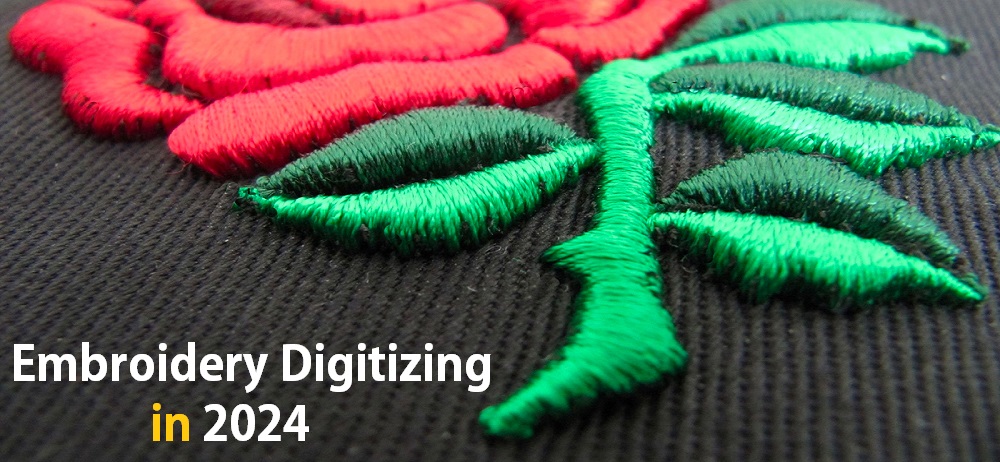
Embroidery patches are created by stitching an embroidery design onto a piece of fabric using various embroidery techniques such as satin, whip, or zigzag stitches. The excess material is then trimmed away, leaving behind a finished patch that can be used for decorative or identification purposes. These patches can be made using a water-soluble stabilizer, which dissolves when placed in water, or self-adhesive patches, which can be easily removed or repositioned.
They come in various shapes, sizes, and designs, allowing endless creativity and customization. Whether you want a permanent patch to sew on or an iron-on patch for convenience. Embroidery patches are a durable and versatile option for adding a unique touch to your garments and accessories.
1. Benefits of Making Your Embroidery Patches
Embroidery patches have gained immense popularity in recent years due to their versatility and ability to add a personalized touch to garments, accessories, and home decor items. While purchasing pre-made patches is convenient, making your embroidery patches offers many benefits that must be addressed.
One of the primary advantages of creating your embroidery patches is the ability to customize the design according to your personal preferences or branding. Whether you want to incorporate your logo, a specific pattern, or even a favorite quote, making your patches allows you to translate your unique vision onto a piece of fabric.
Not only is making your embroidery patches a creative outlet, but it is also a cost-effective solution. Purchasing pre-made patches can be expensive, especially if you require multiple patches or have specific design requirements. By making your patches, you can save money on buying ready-made ones and invest it in high-quality materials instead. Plus, it eliminates the need for stockpiling pre-made patches, as you can create them per your immediate embroidery requirements.
Creating custom patches allows you to experiment with unique designs. Whether you want to create a patch in an unconventional shape or play around with different embroidery techniques, making your patches allows you to let your creativity run wild and create one-of-a-kind designs that stand out from the crowd.
2. Materials Needed for Making Embroidery Patches
Embroidery patches are a fantastic way to add a personalized touch to your clothing or accessories. You’ll need a few essential materials to start making your embroidery patches.
2.1 Fabric
2.2 Thread
2.3 Needle and Threader
2.4 Stabilizer Backing Material
2.5 Scissors or Rotary Cutter
2.6 Iron and Ironing Board (Optional)
2.7 Sewing Machine (Optional)
By gathering these materials, you’ll be ready to start creating your custom embroidery patches from scratch.
2.1 Fabric
Choosing the suitable fabric is essential for achieving a high-quality finished product when creating embroidery patches. The most commonly used material for making patches is felt. Felt is a sturdy fabric that prevents fraying, making it an excellent choice for patches subject to regular wear and tear. It is also available in various colors, allowing you to match or contrast the fabric color to enhance the patch’s appearance. Felt is particularly well-suited for medium-weight, non-stretchy cotton fabrics.
In addition to felt, other fabrics can be used to make embroidery patches. Scraps of fabric are perfect for creating smaller patches or adding unique touches to larger patches. Upcycling wool blankets can also provide a distinctive texture and look to your patches. These alternative fabric choices add character and individuality to your embroidery patch designs.
When selecting fabric for your patches, consider how each type will impact your finished patch’s overall durability and appearance. Felt is a popular option due to its ability to prevent fraying, but don’t hesitate to experiment with different fabrics to achieve the desired effect for your project.
Remember to think about contrasting colors for your patches as well. Choosing a fabric color contrasting your embroidery design can make it stand out more prominently. By selecting the suitable fabric and color for your embroidery patches, you can create beautiful, durable patches that will leave a lasting impression.
2.2 Thread
When it comes to making embroidery patches, different types of thread fills can be used. One option is to create patches with a fabric base, where the embroidery design is stitched onto a sturdy fabric. Another option is to make embroidered badges that are solely made of thread.
Using a fabric base for your patches offers several benefits. Firstly, it requires less thread than patches made entirely of yarn, which can help reduce the cost of materials.
Additionally, stitching onto a fabric base typically takes less time than densely filling a design with thread. This can be particularly advantageous if you produce many patches or need more time to complete your project.
On the other hand, embroidery patches made exclusively of thread can create a more intricate and eye-catching design. The absence of a fabric base allows for detailed and dense stitching, resulting in a patch that stands out and catches the light.
Ultimately, the choice between fabric-based patches and patches made of thread depends on the style and effect you want to achieve. Experiment with both techniques to see which works best for your embroidery patch designs.
2.3 Needle and Threader
When making embroidery patches, using a needle and threader is an essential part of the process. This step requires careful consideration to ensure the design is stitched onto the fabric accurately and securely.
Firstly, selecting the appropriate needle for your embroidery project is essential. Various types of hands, such as embroidery or crewel needles, can be used. Embroidery needles have a sharp point and a large eye, allowing easy threading and smooth stitching. Crewel needles, on the other hand, have a slightly longer and thinner shaft, making them perfect for intricate designs.
Once you have selected the correct needle, you will need a threader to help you easily thread the needle. A threader is a small, thin, and flexible tool designed to guide the thread through the eye of the needle. It saves time and frustration, especially for poor eyesight or shaky hands.
To use the threader, insert the end of the thread into the loop of the threader. Then, gently push the threader through the eye of the needle, guiding the line along with it. Once the thread is through the look of the needle, carefully remove the threader, leaving the thread in place.
Using a needle and threader efficiently ensures that your embroidery design is stitched onto the fabric accurately and with ease. It is a small yet crucial step in the embroidery process that can significantly affect the final result.
2.4 Stabilizer/Backing Material
Stabilizer or backing material plays a crucial role in creating high-quality embroidery patches. It helps to support the fabric during the stitching process, ensuring clean and precise embroidery. Different types of stabilizers are available, including tear-away stabilizers and water-soluble stabilizers.
Tear-away stabilizer is a popular choice for embroidery patches. It is a paper-like material placed on the back of the fabric before stitching. It provides stability and prevents the fabric from stretching or distorting during embroidery. Once the embroidery is complete, the excess tear-away stabilizer can be easily removed by tearing it away from the back of the patch.
The water-soluble stabilizer is another option that can be used when creating embroidery patches. This stabilizer is placed on top of the fabric, directly under the needle, and dissolves when it comes into contact with water. This helps to create beautifully clean and crisp embroidery designs. After stitching, immerse the patch in water to remove the water-soluble stabilizer.
To use a stabilizer, start by hooping the stabilizer with the fabric in an embroidery hoop. This will keep the material taut and ensure smooth stitching. Adjust the tension of the hoop if necessary. Once the hoop is secure, you can start embroidering the patch.
Using stabilizer/backing material is essential when making embroidery patches. It helps maintain the fabric’s integrity and ensures that the embroidery design looks professional and well-defined. So, remember to select the right stabilizer for your project and use it to achieve the best results.
2.5 Scissors or Rotary Cutter
When cutting the fabric for your embroidery patch, you have a few options for tools and techniques. Two commonly used tools are scissors and a rotary cutter.
Scissors are a versatile tool that many people already have on hand. They are great for cutting smaller pieces of fabric and making precise cuts. However, scissors can be less efficient when working with more significant amounts of material and may result in uneven edges.
On the other hand, a rotary cutter is a specialized tool designed specifically for cutting fabric. It features a sharp, circular blade that rolls smoothly along the material, allowing for quick and accurate cuts. This tool is handy when cutting larger pieces of fabric or when working with intricate shapes.
Another option to consider is using a hot knife for trimming and cleaning up the edges of your embroidery patch. A hot knife melts the fabric as it cuts, sealing the edges and preventing fraying. This technique is beneficial when working with fabrics that have a tendency to unravel.
When cutting the fabric for your embroidery patch, it is crucial to consider a few things. Remember to mirror the image before cutting if you use heat transfer vinyl. Additionally, ensure that the patch is manageable for the desired application.
Scissors and rotary cutters are viable options for cutting fabric for your embroidery patch. Scissors are versatile and great for smaller pieces, while a rotary cutter and hot knife provide more precision and efficiency for larger pieces and intricate shapes. Consider these tools and techniques for embroidery based on your specific needs and preferences.
2.6 Iron and Ironing Board (Optional)
In addition to scissors and a rotary cutter, an iron and ironing board can be optional materials to consider when making embroidery patches. An iron and ironing board can help fuse the fabric and create a neat finish for your patch.
Here are the steps for using an iron and ironing board to make your embroidery patch:
1. Cut your fabric into your patch’s desired shape and size using scissors or a rotary cutter.
2. Place the patch on the fabric, right sides facing each other.
3. If you are using a fusible web, place it between the patch and fabric.
4. Set your iron to the appropriate heat setting for the fabric you are using. Be cautious not to use too high heat, which can damage certain fabrics.
5. Place a thin or pressing cloth over the patch and fabric to protect it from direct heat.
6. Press the iron firmly onto the cloth, applying even pressure for 10-15 seconds.
7. Lift the iron and check if the fabric has fused. If not, apply more pressure and repeat the process.
8. Allow the fabric to cool for a few minutes once it is fused.
9. Trim any excess fabric or fusible web from the patch’s edges.
10. Finish your patch using a sewing machine to add stitching around the edges or fabric glue to secure the borders.
An iron and ironing board is optional in creating your embroidery patch, but it can help achieve a professional and finished look.
2.7 Sewing Machine (Optional)
A sewing machine is the way to go if you prefer a faster method for making durable embroidered patches. This method allows you to choose from various stitches on your sewing machine, resulting in a professional finish.
To start, select a sturdy fabric for your patches. Cut the fabric into your desired patch shape and size using scissors or a rotary cutter. Then, choose a stitch from the sewing machine’s menu that best suits your design, such as a zigzag or satin stitch.
Next, position the patch under the sewing machine’s presser foot, ensuring the fabric is securely placed. Begin sewing around the edges of the patch, following the outline. As you sew, maintain a steady pace and guide the material carefully.
Once the outline is complete, you can enhance your embroidered patch by hand-embroidering details like lettering or embellishments. Use strands of embroidery floss in various colors to create intricate designs or add texture.
After you finish all the embroidery work, the patch is ready. Trim any excess fabric or loose threads. These custom-made patches are perfect for decorating garments, bags, or accessories and will make a statement.
Using a sewing machine to create embroidered patches is quicker and allows for more intricate designs. With the versatility of stitch options, you can explore different techniques to personalize your patches, elevating them to a whole new level of creativity.
3. Commercial Embroidery Machine (Optional)
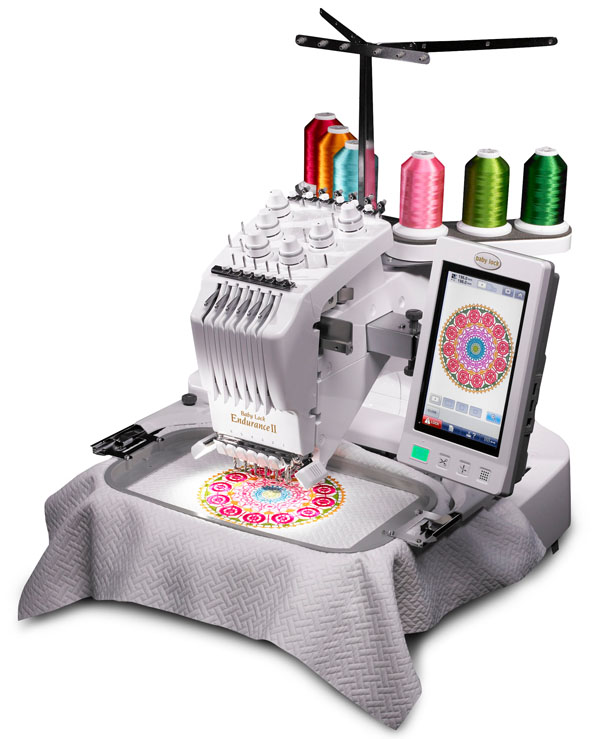
If you’re looking for an alternative method to create embroidered patches, consider using a commercial embroidery machine. This machine not only offers a faster production process, but it also produces durable patches that can withstand wear and tear.
To begin with, prepare your fabric by selecting a sturdy material that can withstand the embroidery process. Cut the fabric into your desired patch shape and size using scissors or a rotary cutter.
Next, choose your embroidery design and upload it into the commercial machine. This versatile machine allows you to select various stitch options to suit your design best. Whether it’s a satin stitch, zigzag stitch, or any other decorative stitch, you can easily adjust the settings and create professional-looking patches.
Once you select your design and stitch, securely position the fabric under the machine’s presser foot. The machine automatically embroiders your design onto the fabric, ensuring precise and consistent stitching.
After the embroidery is complete, carefully remove the fabric from the machine. Trim any excess fabric or loose threads, ensuring a clean and professional finish.
Using a commercial embroidery machine, you can create many high-quality patches in less time. These patches are perfect for various applications, such as embellishing garments, bags, or accessories. So why explore this alternative method to elevate your embroidery patch game?
4. Designing Your Patch
Designing your patch is an exciting step in the embroidery patch-making process. It’s the chance to let your creativity shine and create a unique, personalized patch that stands out. Consider the shape and size that best suits your vision when designing your patch. The possibilities are endless, whether it’s a traditional round shape, a contemporary square shape, or a custom shape that complements your design. Additionally, think about the design elements you want to incorporate.
From intricate patterns and detailed images to simple and bold lettering, choose pieces that reflect your style and make a statement. Once you have a clear vision, you can bring your design to life using embroidery or stitch files, which can be uploaded to your embroidery machine. Take your time designing your patch, and enjoy the creative process as you transform your ideas into a beautiful and unique embroidered piece.
5. Choosing a Shape for Your Patch
When creating an embroidery patch, choosing the right shape is essential. The form of your patch can significantly influence its overall appearance and how it complements its intended purpose.
There are several considerations when selecting a shape for your embroidery patch. First, think about the purpose of the patch. Is it for a sports team, a club, or a special event? The shape should reflect the theme or message you want to convey.
Personal preference is another factor to consider. What shapes do you find visually appealing? Is there a specific shape that holds significance to you or your organization? Choosing a form that resonates with you can make the patch more meaningful.
Popular shapes for embroidery patches include round, rectangular, and unique shapes such as animals, symbols, or objects. Round patches offer a classic and timeless look, while rectangular patches can be more versatile and allow for more intricate designs. Unique shapes add a touch of creativity and individuality to your patch.
Ultimately, the choice of shape for your embroidery patch is subjective and depends on the desired look and purpose. Whether you opt for a classic round patch or a more creative and unique shape, ensuring that it aligns with your intended message and personal taste will result in a patch that stands out and captures attention.
6. Choosing the Right Size for Your Patch
When choosing the right size for your embroidery patch, there are a few factors to consider. The purpose of the patch and its intended placement play a crucial role in determining the appropriate size.
Firstly, think about the purpose of the patch. Is it meant to represent a sports team, a club, or a special event? For example, consider a larger size for a sports team to ensure visibility and impact. On the other hand, if it’s for a more subtle or personal use, a smaller size can be appropriate.
Next, consider the intended placement of the patch. Will it be sewn onto a garment, attached to a bag, or displayed on a hat? This will influence the size, as you’ll want to ensure the patch fits nicely on the intended surface without looking too large or too small.
In addition to these factors, it’s important to ensure readability and visual impact. If your patch includes text or intricate details, selecting an appropriate size is crucial to ensure all elements are clear and legible. Choosing a size that is too small may result in a patch that is easier to read, while choosing a size that is too large may make the design appear crowded or manageable.
7. Transferring your Design onto the Fabric
When making embroidery patches, one crucial step is transferring the design onto the fabric. There are several methods to accomplish this, each with advantages and considerations.
One popular method is using a water-soluble stabilizer. This transparent sheet can be printed with your embroidery design and placed on the fabric. The stabilizer holds the plan in place while you stitch, and once the embroidery is complete, you rinse the cloth with water to dissolve the stabilizer.
Another method is using iron-on webbing. This involves printing your design onto transfer paper and then ironing it onto the fabric using heat. The webbing acts as an adhesive, securing the design to the fabric. It’s essential to follow the instructions provided with the webbing to ensure proper application and durability.
Fusible web is another option. This involves ironing a thin layer of adhesive onto the back of the fabric and then fusing the design onto the fabric by applying heat. The fusible web provides a strong bond and is excellent for intricate designs.
Regardless of your chosen method, it’s crucial to follow the instructions provided with the desired transfer method carefully. This will ensure that the design transfers onto the fabric correctly and that the final patch is durable and long-lasting.
8. The Takeaway
Creating your embroidery patches offers a world of customization, cost-effectiveness, and limitless creativity. Whether you’re adding a personal touch to your clothing or branding your business, making your patches is the way to go. You can choose the shape and size that suits your purpose, select the perfect fabric to match your vision, and transfer your unique design seamlessly onto the material. To make the process even more convenient, you can utilize optional tools like sewing machines or commercial embroidery machines.
So, why wait? Start crafting your custom embroidery patches today and let your creativity shine. For professional embroidery patch services, don’t hesitate to contact us and make your vision a reality. Click here to learn more about our Embroidery Patches Services!
9. FAQs (Frequently Asked Questions)
Q1. What are embroidery patches, and how are they made?
Embroidery patches are custom fabric pieces made using embroidery machines. They are created by stitching an embroidery design onto fabric using various techniques and then trimming the excess material.
Q2. What are the benefits of making your embroidery patches?
Making your embroidery patches allows you to customize designs, save money, and create unique and distinctive patches that reflect your style or branding.
Q3. What materials are needed for making embroidery patches?
Essential materials for making embroidery patches include sturdy fabric, an embroidery design or pattern, water-soluble stabilizer, embroidery threads, and a sewing or embroidery machine.
Q4. What are some fabric options for creating embroidery patches?
Felt is a popular choice due to its durability and prevention of fraying. Other options include scraps of fabric and upcycled wool blankets, offering unique textures and looks.
Q5. What are the advantages of using a sewing machine or a commercial embroidery machine to create patches?
Sewing machines offer quicker production and versatile stitching options, while commercial embroidery machines provide faster production and durable patches suitable for wear and tear.


