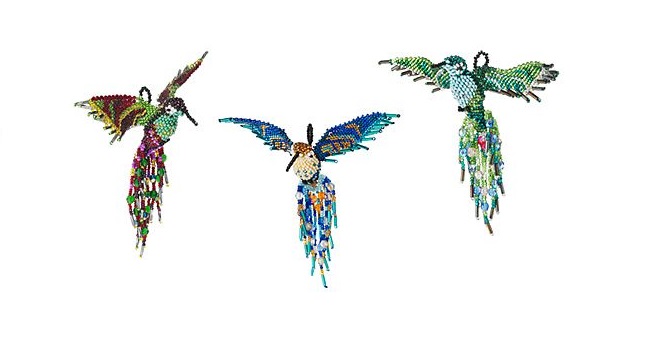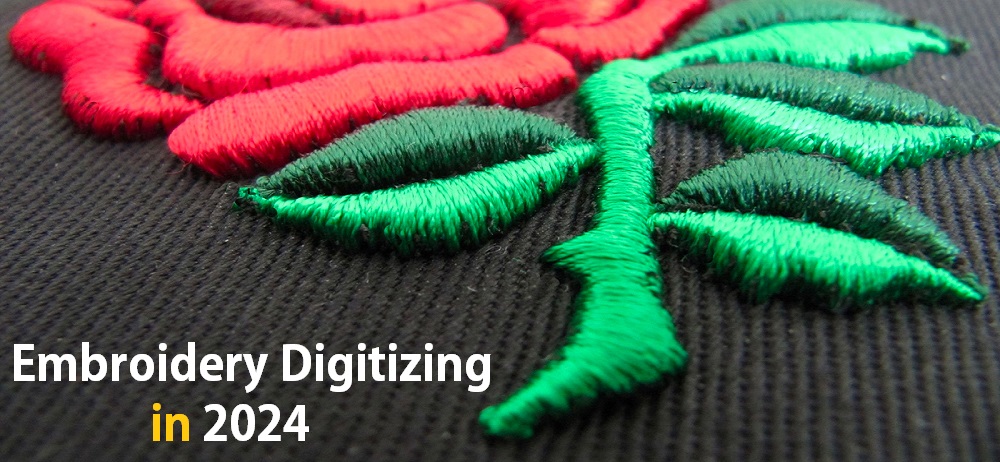
Bead embroidery bliss refers to the joyful and immersive experience of creating intricate and exquisite designs using beads and embroidery techniques. With bead embroidery, one can add dimension, texture, and sparkle to various textiles, accessories, and home decor items. It is a versatile art form that allows for endless creativity and exploration. By combining the art of embroidery with the meticulous placement of beads. Artists can bring their visions to life, creating stunning and unique pieces. From delicate beadwork around crystals to bold and colorful bead collars. Bead embroidery offers a wide range of possibilities.
Whether you are a beginner looking to learn new skills or an experienced artist seeking to push the boundaries of your craft. Bead embroidery bliss provides a fulfilling and satisfying journey into the world of needlework and beadwork.
Table Of Contents
1. Discovering the Different Types of Bead Embroidery
2. Basic Tools and Materials Needed For Bead Embroidery
3. How to Select the Right Beads for Your Embroidery
4. Tips for Choosing Threads and Fabrics
5. Other Necessary Supplies for Creating Bead Embroidery
6. Basic Techniques & Stitches Used in Bead Embroidery
7. Advanced Techniques & Special Effects in Bead Embroidery
8. Conclusion
1. Discovering the Different Types of Bead Embroidery
As a lifelong lover of art and creativity, my personal journey into the world of bead embroidery has been a truly enriching experience. What began as a simple fascination with beads and their intricate beauty quickly evolved into a deep passion for creating stunning works of art through the art of bead embroidery.
In 1999, my dedication to this craft led me to join the esteemed Beadworkers Guild. Here, surrounded by fellow enthusiasts and experienced artisans. I honed my skills and delved deeper into the world of beadwork. Little did I know that this decision would ultimately lead me to share my knowledge and expertise with others.
Impressed by the intricacy and uniqueness of my beadwork, people started to seek me out. Eager to learn the artform and discover the magic of bead embroidery for themselves. Soon, I found myself teaching classes and workshops, sharing the joy and fulfillment that bead embroidery can bring.
In the coming sections, we will explore the various types of bead embroidery techniques that I have come to love and cherish over the years. From the precise and delicate brick stitch to the elegant and sophisticated art deco style. Each technique offers its own charm and challenges. Whether you prefer the simplicity of minimal beadwork or the elaborate beauty of beadwork around crystals. There is truly something for everyone in the world of bead embroidery.
2. Basic Tools and Materials Needed For Bead Embroidery
Bead embroidery is a beautiful and intricate technique that allows you to create stunning designs using beads and thread. To dive into this creative world, it’s important to have the right embroidery tools and materials at your disposal.
The basic tools for bead embroidery include beading needles, embroidery scissors, and bead mats or trays. Beading needles are thin and long, allowing you to easily pass through small seed beads. Embroidery scissors are necessary for trimming thread and cutting beads if needed. Bead mats or trays help keep your beads organized and prevent them from rolling away.
Choosing the right thread for your bead embroidery is crucial. Nylon thread or beading thread is commonly used due to its strength and durability. It’s important to match the weight and thickness of the thread to the size of beads you are working with. Using a heavier thread with delicate beads may cause them to break. While using a thin thread with larger beads may not provide enough support.
Matching the needle, thread, and technique properly is essential for successful bead embroidery. Using a needle that is too thick may cause tangles or thread breakage. While a needle that is too thin may not be sturdy enough to hold the beads securely. Additionally, using the correct technique for different bead sizes and shapes will ensure the longevity and beauty of your piece.
3. How to Select the Right Beads for Your Embroidery
Selecting the right beads is crucial for creating a stunning and visually captivating piece. The choice of beads can greatly impact the overall look and feel of the embroidery. Here are some tips for selecting the perfect beads for your project.
Firstly, consider the size of the beads. Beads come in various sizes, such as seed beads, crystals, and pearls. Smaller beads are ideal for intricate designs and adding delicate details, while larger beads can create a bold and eye-catching effect.
Next, take into account the shape of the beads. Beads come in a variety of shapes, including round, cylindrical, square, and faceted. Different shapes can add dimension and texture to your embroidery, so choose beads that complement your design.
Color is also an important factor to consider. Beads come in a wide range of colors. Allowing you to match or contrast them with the fabric or other elements in your embroidery. Experiment with different color combinations to create a harmonious or striking effect.
Material and finish are additional considerations. Beads can be made from glass, crystal, metal, wood, or even gemstones. The finish can be matte, shiny, iridescent, or metallic. Select beads that suit the style and theme of your embroidery.
4. Tips for Choosing Threads and Fabrics
When it comes to bead embroidery, the choice of threads and fabrics can greatly impact the final result of your project. Here are some tips for choosing the right threads and embroidery fabrics for your bead embroidery bliss:
Threads:
1. C-Lon® Nylon Beading Thread: This strong and durable thread is a popular choice for bead embroidery. It comes in various thicknesses, allowing you to choose the one that suits your project. C-Lon® thread is known for its resistance to fraying and breaking, making it ideal for intricate beadwork.
2. FireLine™ Interknitted Thread: FireLine™ is a strong and flexible thread that is made from gel-spun polyethylene. It is known for its high tensile strength and resistance to abrasion. FireLine™ is a great choice for bead embroidery projects that require durability and long-lasting results.
3. Nymo® Nylon Beading Thread: Nymo® thread is a traditional choice for bead embroidery. It is available in various thicknesses and comes in a wide range of colors. Nymo® thread has a slightly fuzzy texture, which helps to hold beads in place. It is a versatile thread that works well with different bead sizes and types.
Fabrics:
1. Silk Fabrics: Silk fabrics are a popular choice for bead embroidery due to their smooth texture and fine weave. The smooth surface of silk allows beads to slide easily, making it easier to create intricate and detailed designs. Silk fabrics also have a certain level of stiffness, which helps the beads to stay in place.
2. Other Smooth-Holed Fabrics: Apart from silk, other fabrics with smooth holes like satin, organza, and taffeta can also work well for bead embroidery. These fabrics provide a stable base for the beads and allow for smooth and even stitching.
When choosing threads and fabrics for bead embroidery. It’s important to consider the look and feel you want to achieve. As well as the durability and functionality of the materials. Experiment with different combinations to find the perfect match for your bead embroidery projects.
5. Other Necessary Supplies for Creating Bead Embroidery
In addition to threads and fabrics, there are several other necessary supplies for creating beautiful bead embroidery artwork. These items help in achieving the desired results and ensuring that the embroidery process goes smoothly.
1. Needles: Beading needles are specifically designed with a long, slender shape that allows for easy threading of small beads. They have a sharp point that can pass through fabric without causing damage. Embroidery Needles come in various sizes, so it’s important to choose one that is appropriate for the bead size and embroidery technique.
2. Hoop: Embroidery hoops are used to hold the fabric taut and steady while stitching. They come in different sizes and are typically made of wood or plastic. Hoops ensure that the fabric doesn’t warp or shift, allowing for precise and accurate bead placement.
3. Adhesive: Bead embroidery often involves securing larger or more intricate beaded elements to the fabric. Adhesives such as fabric glue or clear craft adhesive are essential for this purpose. They provide a strong bond between the beads and the fabric, ensuring that the embroidery remains securely in place.
4. Scissors: A good pair of sharp scissors is necessary for cutting threads, trimming excess fabric, and tidying up loose ends. Precision is important in embroidery, so it’s essential to have scissors that can make clean and accurate cuts.
5. Embellishments: Apart from beads, other embellishments like sequins, rhinestones, or charms can be added to enhance the design. These decorative elements add texture, sparkle, and dimension to the bead embroidery artwork.
These necessary supplies are essential in achieving successful bead embroidery projects. They ensure that the process is smooth, the results are stunning, and the end product is a work of art.
6. Basic Techniques & Stitches Used in Bead Embroidery
Bead embroidery is a beautiful and intricate form of art that involves stitching beads onto fabric to create stunning designs. This technique requires a combination of skill and creativity, as well as mastery of various stitching techniques. In this section, we will explore some of the basic techniques and stitches used in bead embroidery. Providing you with the knowledge and inspiration to begin your own bead embroidery journey.
1. Brick Stitch Technique
2. Backstitch Technique
3. Lazy Daisy Stitch Technique
4. Herringbone/Brick Stitch Combination
5. French Knots Technique
6. Running Stitch Technique
7. Peyote Stitch Technique
8. Ladder Stitch Technique
1. Brick Stitch Technique
The Brick Stitch is a versatile and fundamental technique in bead embroidery that allows for the creation of beautiful and intricate designs. This stitch is commonly used to create rows or columns of beads that resemble the pattern of bricks, hence its name.
To start a brick stitch, thread your needle and knot the end. Bring your needle up through the fabric, leaving a short tail of thread on the backside. String the desired number of beads onto the thread and bring the needle back down through the fabric. Making sure to pass it through the last bead strung.
To create subsequent rows, bring the needle up through the fabric, skipping one or two beads from the previous row. String the next set of beads onto the thread and bring the needle down through the fabric, passing it through the last bead strung. Repeat this process for each row, ensuring the beads are aligned in a brick-like pattern.
When increasing or decreasing stitches, simply add or skip additional beads in the row. Consistency is key in maintaining a uniform pattern, so be mindful of the tension and the size of the beads used throughout the project.
2. Backstitch Technique
The backstitch technique is a commonly used stitch in bead embroidery that creates a secure and neat line of beads. It is often used to outline shapes or create intricate patterns. To create a backstitch, start by threading your needle and knotting the end.
To begin, bring the needle up from the back of the fabric to the front, at the starting point of your backstitch. Leave a short tail of thread on the backside to secure the beadwork.
Next, insert the needle back into the fabric a short distance away from the starting point, creating the first bead in the backstitch. This will anchor the beads to the fabric.
To continue the backstitch, bring the needle up from the back of the fabric, a short distance away from the previous bead. String the desired number of beads onto the thread, and insert the needle back into the fabric, passing it through the last bead strung.
Repeat this process for each bead, making sure to maintain consistent spacing and tension. The beads should align neatly in a continuous line, giving a clean and professional appearance. To finish the backstitch, bring the needle down through the fabric and secure the thread with a knot on the backside.
3. Lazy Daisy Stitch Technique
The Lazy Daisy Stitch Technique is a popular technique used in bead embroidery to create delicate and intricate petal or leaf shapes. This stitch involves creating individual stitches that are looped and anchored at the base, resembling the petals or leaves of a flower.
To execute the Lazy Daisy Stitch Technique in bead embroidery, start by creating a foundation row of straight stitches. These stitches will serve as a base for the looped stitches that will form the petals or leaves.
Next, bring the needle up through the fabric at the desired starting point, and string a bead onto the thread. Hold the bead in place with your non-dominant thumb or finger. Then, bring the needle back through the fabric at a short distance from the starting point. Creating a small loop of thread. Hold the loop in place with your thumb or finger.
To form the petal or leaf shape, bring the needle back up through the fabric inside the looped thread, making sure to catch the bead in the process. This will secure the loop and create the desired shape.
Continue this process for each petal or leaf, maintaining consistent spacing and tension. The looped stitches should align neatly and create a beautiful and natural petal or leaf shape. To secure the thread and finish the Lazy Daisy Stitch, bring the needle down through the fabric and secure it with a knot on the backside.
4. Herringbone/Brick Stitch Combination
The Herringbone/Brick Stitch Combination is a fantastic technique used in bead embroidery to create unique patterns and textures. This stitch combination combines the herringbone stitch and the brick stitch to achieve stunning and intricate designs.
To start working this stitch combination, you will need a foundation row of herringbone stitches. These stitches will serve as the base for the brick stitch that will be added later. Begin by creating a row of herringbone stitches using your desired beads.
Once the foundation row is complete, you will move on to the brick stitch. Bring the needle up through the fabric at the edge of the herringbone row. String a bead onto the thread and position it against the fabric, next to the last bead in the herringbone row.
To work the brick stitch, bring the needle back through the fabric, passing through the bead just added and then through the fabric again a short distance away. This will secure the bead and create the first vertical stitch of the brick stitch.
Continue adding beads in this manner, always bringing the needle back through the fabric, passing through the new bead and then through the fabric again. To finish the Herringbone/Brick Stitch Combination, secure the thread on the backside with a knot once you have completed the desired number of rows.
5. French Knots Technique
French knots are a versatile and beautiful stitch that can add texture and dimension to your bead embroidery projects. By incorporating beads into the traditional French knot technique, you can create stunning and intricate designs.
To make French knots using beads and thread in bead embroidery, follow these steps:
1. Thread your beading needle with a suitable length of thread. Choose beads that will fit your desired knot size.
2. Bring the needle up through the fabric at the desired location for the French knot.
3. Slide a bead onto the thread, allowing it to rest against the fabric.
4. Hold the bead in place with your fingertips and wrap the thread around the needle two or three times. Make sure the wraps are close to the bead and evenly spaced.
5. With the wraps secured, gently insert the needle back into the fabric near the entry point. Ensure that the wraps stay in place while doing this.
6. Hold the thread taut and carefully pull the needle through the wraps until the knot snugly forms against the fabric.
7. Continue making French knots with beads in desired locations, taking care to maintain consistent size and tension.
French knots can be used in various creative ways in bead embroidery projects. You can use them to create flowers, polka dots, or intricate patterns. They can also be used to fill in spaces or as accents for specific design elements. Experiment with different bead sizes and colors to achieve a unique and personalized touch to your bead embroidery work.
6. Running Stitch Technique
The running stitch technique is a fundamental embroidery stitch often used in bead embroidery. It is a simple and versatile stitch that can be executed with ease. Making it suitable for both beginners and experienced embroiderers.
To create the running stitch, start by threading your beading needle with a suitable length of thread. Choose beads that complement your design. Begin by bringing the needle up through the fabric at the desired starting point. Then, insert the needle back into the fabric a short distance away, leaving a small gap in between. Continue this process, making evenly spaced and parallel stitches along the desired line or shape.
7. Peyote Stitch Technique
The peyote stitch is a versatile stitch that can be used to create intricate beadwork patterns. It involves stitching beads in a zigzag pattern. With each row offset from the previous row. This creates a dense and flexible beadwork fabric.
8. Ladder Stitch Technique
The ladder stitch is a basic stitch used to create a foundation for beadwork. It involves stitching beads in a straight line, with the needle passing through each bead twice to secure it in place. This stitch can be used as a base for other stitches or as a decorative element on its own.
By mastering these basic techniques and stitches, you will be well-equipped to create your own bead embroidery designs. Experiment with different combinations of stitches and bead colors to add your own unique touch to this timeless art form.
7. Advanced Techniques & Special Effects in Bead Embroidery
Bead embroidery is an art form that offers limitless creative possibilities. While the running stitch is a fundamental technique, there are advanced techniques and special effects that can take your bead embroidery to the next level. These techniques allow you to enhance and elevate your artwork, creating unique and stunning pieces.
1. One technique is layering beads, which involves stacking multiple rows or layers of beads to create depth and dimension. This technique adds visual interest and complexity to your design, making it truly stand out.
2. Another technique is adding dimension with raised stitches. By using techniques like the peyote stitch or brick stitch, you can create raised areas within your beadwork. This adds texture and tactile appeal, making your embroidery come to life.
3. Incorporating mixed-media elements is another way to enhance your bead embroidery. You can combine beads with other materials like fabric, leather, or metal to create interesting contrasts and textures. This adds a unique and personal touch to your artwork.
4. Surface textures are another exciting technique in bead embroidery. By using different bead sizes, shapes, and finishes. You can create textured patterns that catch the light and add depth to your design. Experiment with bead weaving techniques like the herringbone stitch or netting stitch to achieve different textures and effects.
With these advanced techniques and special effects, you can truly push the boundaries of bead embroidery. By embracing experimentation and creativity, you’ll create unique and stunning works of art that showcase your skills and creativity.
8. Conclusion
In the world of bead embroidery, creativity knows no bounds. The fusion of beads and intricate stitching techniques brings to life a realm of artistic possibilities. Whether you’re a novice eager to learn or a seasoned artist ready to push your craft’s limits. Bead embroidery offers a fulfilling journey into the realm of needlework and beadwork.
Whether you’re an aspiring artist or an experienced craftsman, bead embroidery promises a world of endless exploration and creative joy. Now, take the next step in your artistic journey and explore our professional embroidery digitizing services to transform your beadwork into digitized masterpieces. Let your imagination run wild, and together, we’ll turn your bead embroidery into a digital canvas of limitless potential.
FAQs (Frequently Asked Questions)
Q1. What is bead embroidery bliss, and how does it enhance artistic creations?
Bead embroidery bliss refers to the immersive experience of creating designs with beads and embroidery techniques. It adds dimension, texture, and sparkle to various items, enhancing artistic creations.
Q2. What are some essential tools and materials required for bead embroidery?
The basic tools for bead embroidery include beading needles, embroidery scissors, and bead mats or trays. It’s crucial to match the thread weight to the bead size and use the appropriate technique for different bead types.
Q3. How can one select the right beads for their embroidery project?
When choosing beads, consider factors like size, shape, color, material, and finish. The choice of beads should complement the design and theme of the embroidery project.
Q4. What are some advanced techniques in bead embroidery?
Advanced techniques in bead embroidery include layering beads for depth, creating raised stitches for texture, incorporating mixed-media elements for contrast, and utilizing surface textures with various bead sizes, shapes, and finishes.
Q5. How did the author’s journey in bead embroidery lead to sharing their expertise with others?
The author’s journey began with a fascination for beads, which gradually evolved into a deep passion for bead embroidery. Joining the Beadworkers Guild and impressing others with their work eventually led to teaching classes and workshops, allowing them to share their knowledge and expertise with others.


